Ohhhhh home made nut butter. I start drooling at just the thought of it. Honestly, it’s got that same irresistible effect as fresh baked cookies out of the oven does. You just have to have some!
And we’re not talking about any type of nut butter, here, we’re talking the creme de la creme … the Nutella nut butter.
Now read carefully throughout this recipe before diving in, there’s some super important tips and tricks I want to share with you to make you live your best nut butter Nutella life.
Creating your own nut butter is not just about flavor and that creamy pour—it’s also an eco-friendly choice. By making nut butter at home, you reduce the need for store-bought products packaged in single-use containers, minimizing your environmental impact, win win!
So time to start blending! This little beauty of a recipe is such a goodie, you’ll be the favourite of the family if you’re holding a jar of this liquid gold! Enjoy!
Why You’ll Love This Recipe:
- Healthier Than Store-Bought: Take control of what goes into your nut butter by making it from scratch. Unlike many store-bought options that contain additives, preservatives, and excess sugars, this homemade version uses wholesome ingredients. You can adjust the sweetness and flavor to your liking, ensuring a healthier alternative to commercial spreads.
- Fun to Make with the Family: Turn your kitchen into a creative space for the whole family. From roasting the nuts to blending the ingredients, making homemade nut butter is a delightful activity that everyone can enjoy together. Get the kids involved in de-skinning the hazelnuts or adding the final touches. It’s a hands-on experience that ends with a tasty and rewarding treat.
- Absolutely DELICIOUS! : Nutella has a hold over the world for a reason, and you can totally see why! By creating your own you’ll be able to indulge guilt-free!
First things first… are your nuts covered or naked?
Big question here, because it will affect your cooking time. Are you starting off with hazelnuts skin on or prebought blanched and de-skinned hazelnuts? From a sustainability perspective we love to go with skin on, so with that in mind, I’m going to give you a few ways that you can tackle that pesky outer layer.
- Boiling Method:
- Bring a pot of water to a boil.
- Add the raw hazelnuts and let them boil for about 3-4 minutes.
- Drain the hazelnuts and immediately transfer them to a bowl of ice water to stop the cooking process.
- Rub the hazelnuts between your fingers or using a clean kitchen towel to remove the loosened skins.
- Baking Method:
- Preheat your oven to 180°C (350°F).
- Spread the raw hazelnuts in a single layer on a baking sheet.
- Roast them in the oven for about 10-15 minutes until the skins darken and start to crack.
- Remove from the oven and let them cool slightly.
- Transfer the hazelnuts to a clean kitchen towel and rub them vigorously to remove the skins.
- Blanching Method:
- Bring a pot of water to a boil.
- Add the raw hazelnuts and boil them for about 1-2 minutes.
- Drain and immediately rinse the hazelnuts under cold water.
- Rub the hazelnuts with your fingers or between two kitchen towels to remove the skins.
- Freezing Method:
- Place raw hazelnuts in a single layer on a baking sheet and freeze them for at least 2 hours or overnight.
- Once frozen, remove the hazelnuts from the freezer and let them sit at room temperature for a few minutes.
- Rub the hazelnuts together in your hands or between two kitchen towels to remove the skins, which should come off easily after freezing.
Choose the method that works best for you based on your preferences and equipment available. De-skinning hazelnuts may require a bit of patience, but it’s worth the effort for smoother and more flavorful homemade nut butter!
Tips for the best Nut Butter:
- Don’t Keep Your Eye Off the Nuts When Roasting: Hazelnuts can quickly go from perfectly roasted to burnt if left unattended. Keep a close eye on them in the oven and check frequently to prevent over-roasting.
- Blend While Still Warm: After roasting, blend the hazelnuts while they are still warm. Warm nuts release their oils more easily, resulting in a smoother and creamier nut butter. Stop and scrape down the sides of the blender as needed to ensure even blending.
- Choose Your Blender Wisely: Use a high-powered blender or food processor for making hazelnut butter. These appliances are more effective at breaking down the nuts into a smooth buttery consistency. If you have a less powerful blender, you may need to blend in smaller batches or use a tamper to help the blending process.
Frequently Asked Questions:
- How long does homemade nut butter last? Store your homemade nut butter in an airtight glass jar in the refrigerator. It should stay fresh for up to 2-3 weeks. For longer shelf life, consider freezing portions in an ice cube tray and thawing as needed.
- Can I use a different type of blender or food processor? A high-powered blender or food processor is recommended for this recipe to achieve a creamy texture. However, you can experiment with different equipment based on availability. Just be mindful of the motor’s capacity and blend in smaller batches if necessary. In my experience, the best blenders for nut-butters that I’ve personally used are the Vitamix, however other high powered blenders such as Thermomix also do the job. If you’re using something like the handy dandy Nutribullet, just be mindful of the capacity and overheating the motor. I’d suggest blending in batches and using their smaller cup, or adding in a teaspoon of other nut butter (eg almond butter) to get the blending going. You can add in coconut oil however I prefer to avoid this as I feel like it affects the taste and the consistency (especially if refrigerated).
- Should I store nut butter in the fridge? Yes, refrigeration helps maintain the freshness and texture of the nut butter, especially since it does not contain preservatives. Before use, allow the nut butter to come to room temperature for easier spreading.
Sustainability & Nut Butters:
Creating your own nut butter is not just about flavor—it’s also an eco-friendly choice. By making nut butter at home, you reduce the need for store-bought products packaged in single-use containers, transportation involved in the protect and in general minimizing your environmental impact. If you opt for sustainably sourced hazelnuts, or better yet, if you have a particular nut that native to your area (Eg: Macadamias in central Queensland Australia) this is an even better option! Embrace homemade creations as a step toward a greener kitchen and a healthier planet.
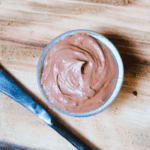
Enjoy this homemade Chocolate-Hazelnut ‘Nutella’ Nut Butter on toast, pancakes, or fruit or just grab a spoon and have some straight out of the jar for a delightful and guilt-free treat. With every spoonful, savor the taste of sustainability and creativity in your kitchen!

Chocolate-Hazelnut ‘Nutella’ Nut Butter
Ingredients
- 2½ cups roasted hazelnuts
- 1/4 cup cacao powder
- 1/2 cup pitted dates
- 1 tsp vanilla extract
- pinch of salt
Instructions
- Preheat your oven to 180℃
- Line a baking tray with baking paper, and spread out your hazelnuts evenly
- Place in oven and roast your hazelnuts for 10-15 minutes. Keep a close eye on them as they can burn in a blink of an eye!
- Take out hazelnuts and let them cool for 5 minutes.
- If your hazelnuts have skin on them, it's time to de-skin them. Take a clean kitchen towel or a rough cloth. Place the roasted hazelnuts in the center of the towel and fold it over the nuts. Rub the hazelnuts vigorously within the towel to loosen and remove the skins. Continue rubbing until most of the skins are removed. You might need to repeat this process a few times with a fresh towel if necessary.
- Now blend hazelnuts in a food processor until they form a smooth butter. It's good to do this while they're still a bit warm as the oils will be released easier. Stop and scrape down the sides to make sure all of the nuts are blended evenly. This will take about 5-10 minutes depending on your blender.
- Now add in cocoa powder, pitted dates, almond butter, vanilla extract, and salt and continue to blend until combined.
- Store in an airtight glass jar in the refrigerator.